
Each year I surprise Mr.AP with a hand crafted gift for Christmas. Judging from his reaction, the way his eyes sparkle and become all moist when he opens them, I believe these are the ones he treasures the most. I’ve made him acrobatic mice who regularly steel our cheese, a fearsome pirate with a boat, and painted him bright Cornish harbors, among other things. Last year I decided to make him a hot air balloon. Thinking about it, I have absolutely no idea where I got the idea from.
As with all of Mr.AP’s gifts this was done at the (very) last minute, in a mad rush and in the most ridiculous manner. I’d lock myself in to our bedroom for the entire day, screen-off half our living room so he’d see nothing, or I’d barricade myself in the kitchen. Each time I forbade him from coming within a 5 meter radius of me. Which in hindsight is pretty funny considering that our apartment is not much bigger than that.


So with all the fussing, the conspiratorial scheming and the time pressure going on I completely forgot to take pictures. I was busy papier-macheing and fending him off all at the same time (talk about multi-tasking)! Good news is, even if there are no pictures of my own, I can share the instructions I followed back in the day from this Martha Stewart project. As easy as is it is though, I did get into a pickle a couple of times. There are things I learned the hard way. things I wish I knew before getting into the project.
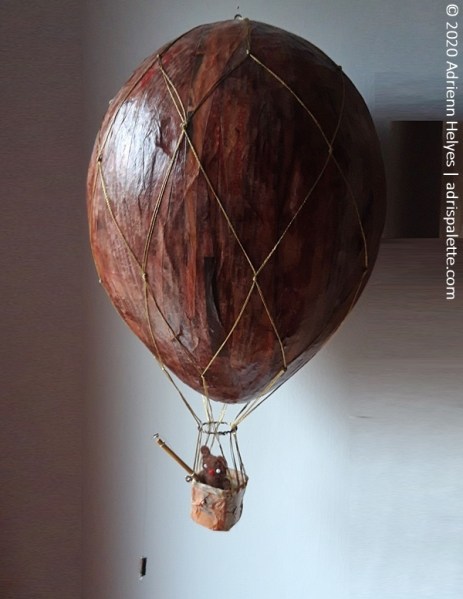
So here it goes, these are my 6 tips to successfully make a papier-mache hot air balloon.
- Think about your long term plans. Do you want to hang the balloon? If so, attach a hook to the balloon before you start to papier-mache.
- The skinnier you make the newspaper triangles, the rounder and prettier the final shape will be. At the same time it will take you (
ages) longer to complete. - Let each layer of the papier-mache dry completely before proceeding with the next one.
- if you plan to paint or varnish the balloon, do it before you deflate it. Deflation should be your very last step and only when the balloon is stone dry!
- Give yourself enough time for the project. With a drying time of about 24 hours between layers, painting and varnishing plus additional decoration the balloon will take you about 4 – 5 days to complete.
- As with all Christmas gifts, plan ahead and don’t leave it for the last minute!
With these tips I think you should be good to go. It does take time, but it is worth every single minute. It could even be a fun little project to do with young ones! And if you decide to make one, send me a picture. I’d love to see it.
If you liked this post you might also enjoy…


November 24, 2020 at 12:39 PM
Just wow. Looks so exciting to make!
LikeLiked by 1 person
November 24, 2020 at 7:13 PM
It was fun! You should really give it a go if you enjoy papier-mache
LikeLiked by 1 person